Friday 31 March 2017

What is Power Focus on a Canon lens?


A few of the most recent Canon telephoto lenses a feature called "Power Focus" or PF. What is the purpose of the setting and does it benefit photography at all?


I have found the following lenses currently have this feature:


  • Canon EF 300mm f/2.8L IS USM II

  • Canon EF 400mm f/2.8L IS USM II

  • Canon EF 200-400mm f/4L IS 1.4x USM


The manual for the Canon EF 300mm f/2.8L IS USM II notes on page 10:


Using the playback ring enables smooth focus change.


This is a useful feature for changing focus when shooting movies.


Thursday 30 March 2017

technique - How do I know I have the correct exposure when shooting in manual mode?


I have a Canon XTI which I've been using for a few years now. Most of the time I'm been shooting in one of the "semi-manual" modes like aperture priority or shutter priority, but now I'd like to try using full manual mode. I should have a new EF-S 17-55 f/2.8 delivered when I get home today. Before I was using a variable aperture Sigma 17-70 which made manual mode more difficult with the aperture changing arbitrarily.


I understand the effect of changing aperture and shutter speed, but right now I'm accustomed to only controlling one at a time. The camera is usually setting the other to get the right exposure automatically for me. So if I'm controlling both how do I know I have the correct exposure? I understand I need to use the metering in my camera but I'm not sure exactly how do do that.


First when should I be using each of the metering modes (Evaluative, Partial, Center weighted, or Spot)? These just change the area of the scene which is metered correct?


How do I know what the meter should read off a specific object? Obviously if I just happen to be shooting a 18% gray wall then it should be at zero, but that can't apply to everything? If I'm shooting a black cat and take a spot meter reading off of the cat then the meter should read less then zero right? But how do I know how much less then zero? Are there rules of thumb I can follow? I've ordered a couple gray cards with my new lens. So experimenting with those should help.


How often should I be changing these settings? Say I'm at a party indoors which is consistently lit. I should be able to set the aperture, shutter speed, and ISO and just forget about it unless the lighting changes correct? Does the same apply to outdoor scenes? I've been hesitant to use manual mode in the past because I felt like I was spending a lot of times messing with settings before each shot. But not I'm realizing that this is really only the case when the lighting changes, or I want a different style of photo such as a different depth of field.


Finally, does exposure change with distance to the subject? For example say I want to take a picture of a statue with correct exposure using a gray card. I'd place the card on the statue, and while being careful not the block the light on the card find the correct exposure by spot metering the card. If I were then to step back 20' to get the whole statue in frame would I still have the correct exposure?


How can I convert an Apple iOS HEIF image into JPEG?


How can I convert an HEIF/HEIC image into a JPEG? Maybe using ImageMagick?


Tuesday 28 March 2017

lens - What is USM, and what are its pros and cons?


My Canon lenses have the designation USM on them, which I assume is for the same reason that they say "Ultrasonic". What does this mean, and why or why do I not want it?


Answer


USM - Ultrasonic motor (This is the Canon Terminology)


This is a big improvement over older micro-motor based autofocus systems, which are significantly slower and louder. There are two types of USM systems "Micro" and "Ring". The preferred type is "Ring Type" which always allows for manual focus without turning off auto-focus. Most, but not all, Micro USM lenses from Canon also have full time manual focusing.


Benefits of Ultrasonic motors:


  • Faster focusing


  • Quieter

  • Full time manual focus (for ring-type USM and many but not all Micro USM lenses)


Downsides:


  • Higher Cost


Branding


USM is a Canon trademark, so similar terms are used by other manufacturers. These other names include:


  • USM: Ultrasonic Motor (Canon)

  • SWM: Silent Wave Motor (Nikon)

  • SWD: Supersonic Wave Drive Motor (Olympus)

  • SDM: Supersonic Drive Motor (Pentax)

  • SSM: In-Lens Super-sonic Motor (Sony/Minolta)

  • HSM: Hyper-Sonic Motor (Sigma)

  • USD: Ultrasonic Silent Drive (Tamron)


exposure - Should I use Manual or (semi-)automatic mode for timelapse in changing light?


I'm planning a long road trip (east coast to west coast, about 45 hours of driving) and am thinking about shooting a time-lapse video of my drive.


As I can expect the light levels to change pretty drastically throughout the day (especially through sunset), how do I adjust my exposure to ensure smooth video?


If I set the camera on a program mode, the camera will compensate for the changing composition, which will cause flicker.


However, if I set the camera on manual mode, I can only adjust periodically (gotta keep my hands on the wheel), so I'm expecting that the exposure might occasionally be off by more than the stop or two recoverable in post.


Where's the middle ground? Should I just shoot in manual, adjust periodically, correct in post, and hope that I don't lose highlight or shadow detail? Should I shoot in a program mode and perform the same correction?


Since I'm planning to shoot tethered, is there a way to control exposure with the computer? Can I get metering information from a tethered (Nikon) camera, so that I could find/write a script that would smoothly adjust the exposure?


Answer


tl;dr: There is currently no 'foolproof/plug-n-play' solution to this problem (yet!). All of the currently available options have trade-offs which must be evaluated before jumping in.


This is a huge problem which is frequently discussed in the timelapse community. As of this writing there are not 'foolproof' solutions, though there are a good number of us who are attempting to create various 'plug-n-play' solutions to the problem.


As stated elsewhere, all automated modes tend to introduce a rather annoying level of flicker, especially during dawn and dusk when the light changes especially rapidly. While to some extent this can be managed with software that 'equalizes' the light levels across multiple frames and reduces flicker in post production for a short timelapse, the longer the timelapse is, the more problems are introduced in that the level of computer which can accomplish this task without simply breaking down and weeping openly is quite expensive. Additionally, whether these types of software are capable of doing a 'reasonable' job at the task of removing flicker is hotly debated by some.


One solution that a lot of us have had success with is to take bracketed frames instead of singles. This gives the option of using fading in post production to adjust in a relatively seamless way for the extreme changes that can occur. Depending on your camera you may be able to adjust for up to +4/-4 stops, giving you an effective dynamic range of 8 stops (full day to full night is approximately 12 stops, YMMV depending on time of year, location on the planet, etc.). Shoot that in RAW (gulp!) and you can batch process to add stops even beyond that. You'd have to experiment in order to see if the motion of your vehicle causes too many syncing problems, but I suspect that since you'd be fading between large chunks of frames, the syncing problems wouldn't be that bad. Obviously this is less than ideal in other ways, namely file size, so as always there is a trade-off to be evaluated.


I believe it would be possible to code a software solution to provide intervalometer functionality as you asked about. The problem that would need to be solved is that the software-based intervalometer would also have some sort of powered light sensor which would tell the computer what to adjust the shutter speed to. Either that or you could (hypothetically) build an algorithm that generates an appropriate curve to simulate the falloff of light as full-day goes to full-night. Then this algorithm could be used to automatically adjust shutter speed in a 'dumb' manner (e.g. it doesn't actually know what the light level is). All of this leads to the 'nuclear option' of options (at least as of this writing, anyway)...


What I have chosen to do is probably even an order of magnitude more extreme than anything above... I built my own intervalometer which includes a built in light meter and can adjust the shutter speed shot to shot as the lighting levels change. This is- by far- the most reliable way I've found to handle changing lighting conditions, and with it I've been able to get flicker-free full-day to full-night timelapses. But naturally the trade-off is that this is a home-brew device, so an electronics background (or a willingness to learn), the ability to code, or re-purpose others codes, a couple-hundred dollars worth of electronics parts and a soldering gun is required for this solution.


terminology - What is bokeh, exactly?


I understand that "bokeh" refers to out-of-focus areas of an image — but there is obviously more to it than that. What does the term mean exactly? How well is bokeh really understood? Is it purely subjective, or can it be evaluated, measured, classified? And how can bokeh be compared and contrasted in different lenses?


Answer


Most importantly: It's not just the disks rendered from a point source, even though that's the simplest way to describe it and see it. The disk is just a shorthand; the lens characteristics that produce these disks are always present; they're what determines the look of the out-of-focus areas in every photo you take!


On the one hand, it's quite well-understood in that cause and effect are fairly well known. On the other hand, what makes one type "good" or "bad" is (as with so many things) extremely subjective and sensitive to context. The general consensus is that good bokeh renders a smooth background without artifacts, but like so many other things, it's possible to make a good picture with "bad" bokeh; it might even be a good picture because of 'bad' bokeh, like the examples with shaped apertures.


Shape: The shape of the disk is determined by the shape of the aperture, and is well-described in other answers (though see also the note on 'distortion' below).


Brightness: The brightness across the disk is influenced by other aspects of the lens, primarily its degree of spherical aberration. There are three basic situations, simulated here: bokeh


In the centre is what you get from a perfectly-corrected lens (or close to it): a disk evenly lit from edge to edge – this is the situation in a large number of modern lenses.


On the left is "smooth" bokeh: a bright centre with a gradual fall-off towards the edge. This is what's generally considered to be desirable, as it blends smoothly and eliminates hard edges in the background.


On the right is what I call "bright-line" bokeh; a bright exterior that fades towards the centre. I'll emphasise that while you get a similar "doughnut" shape from catadioptric lenses, you can see this bright-line effect in many other lenses as well to a lesser degree. Classicaly, this is the less-desirable kind of bokeh, as it will emphasise edges in the background, sometimes to the extent of rendering them as parallel lines.


When you get each type depends largely on spherical aberration, with the background rendering being most important:


  • Under-corrected lenses will typically exhibit smooth bokeh in the background, with the bright-edged type in the foreground. Many of the classic portrait lenses are deliberately designed this way, and it's also what's largely responsible for the very smooth "creamy" look of many older lens designs like the Zeiss Sonnar or Voigtländer Heliar.


  • Over-corrected spherical aberration will produce the opposite; a smoother bokeh in front of the plane of focus, the harsher one behind. This is often a characteristic of lenses that are both fast and sharp, like many 50mm f/1.4 designs, as well as some macro designs (where sharpness is at a priority). While this type of bokeh might be the classically "bad" one, the effect is not usually extreme, and other characteristics of the lens can more than make up for it.


Distortion: Ideally, all disks would be round and a similar shape, but various other aspects of the lens will stretch them to ovals (astigmatism, field curvature), create small tails (coma), or there may even be mechanical obstructions that cut off edges. All of these tend to be much more obvious as you move towards the edge of the frame.


Color: Chromatic aberrations will colour the disk; lateral chromatic aberrations will create the familiar magenta/green fringing, and longitudinal chromatic aberration will cause a slight colour cast over the entire area of the disk, which will be a different colour in front of the plane of focus than behind.


Examples and links:


  • http://www.rickdenney.com/bokeh_test.htm for a very thorough test of a number of different lenses and lens designs. If you want to see an example of classically "good" bokeh, his Sonnar examples are worth checking out.


  • http://jtra.cz/stuff/essays/bokeh/ is another good article with practical details and examples.


  • Mike Johnson has an interesting essay about the entry of the term "boken" into English. He also links a list of ratings of various lenses [PDF] (unfortunately with only two examples). To emphasise the subjective and variable nature of things, the same Sonnar design Denney praises gets a 5/10 from Johnson (who I think is using a later Contax SLR version).


Monday 27 March 2017

lighting modifiers - Are small on-flash softboxes useful, or a gimmick?


There are a number of "mini-softbox" products on the market. These are meant to mount on a hotshoe flash (usually with an elastic band).


fair-use small image from lumiquest
Lumiquest Softbox III


Are these worthwhile portable and low-space light modifiers, or are they more gimmick than useful? Are they large enough to meaningfully diffuse light for portraits? Are they too close to the flash?


What are the use cases that these are especially good for? What can't they do?


Are any particular designs better than others?


Answer


I have the Lumiquest Softbox III that's mentioned, and I find it useful as a super-portable softbox that's better than nothing. Given the option to have a huge softbox that would be my first choice, but the small softbox, placed very close to a subject, works really well and provides a much softer directional light than one would get with a bare flash or with just a simple diffuser such as an Omni-Bounce.


flash - Yongnuo YN-685 underexposure issue in bounce mode at longer focal length


I just purchased a new Yongnuo YN685 to replace a trusty but old Canon 580-EX (the original, not the II version) that is misfiring and may be on its last legs.


After playing with it for a few minutes I seem to have found a major problem with severe underexposure in bounce mode at longer focal lengths. My question is whether this is a sample defect, a design or firmware issue, or it's just how this speedlite behaves. As an event photographer I use bounce mode almost exclusively, so if this is just the way it works it is not usable for me.


I have obtained identical results using two different units purchased through completely different channels, so I'm leaning towards a firmware programming problem.


Below is a summary of my research, including sample images. I can make the RAW files available if necessary


Intro


I'm using the YN685 with a Canon 5D3 and 24-105mm f/4 L lens. At 24mm the exposure, in an appropriate bounce situation, (white ceiling) looks reasonable and about the same as what I get with the 580-EX.


As the lens is zoomed in the exposure gets progressively worse (under exposed) so that at 105mm, in exactly the same location, distance and bounce configuration the image is between 2 and 3 stops under-exposed. I know the flash has plenty of power because it produces the correct exposure at 24mm, and I can force the correct exposure at 105mm if I set the flash to manual 3/4 power instead of ETTL.


My 580EX has no problem with this situation at any focal length.


Images


The following images demonstrate the problem. They were all taken on the above-mentioned 5D3/24-105 on a tripod with the flash mounted to the camera hot shoe. The camera was set to manual exposure 1/125 at f/8 with the flash head pointing straight up to a white 10 foot vaulted ceiling. The images were shot in RAW and then imported into Lightroom and immediately exported as 900x600 JPEGs with no manual editing applied.


The file names have the form


[Flash]_[FlashMode]_[FlashZoomSetting]_[LensFocalLength].jpg

where [Flash] is the speedlite name, [FlashMode] is ETTL or M075 for "manual 3/4 power", [FlashZoomSetting] describes whether the flash zoom is manual or automatic, and the focal length, and [LensFocalLength] is obvious.


The first two show the results with my Canon 580-EX speedlight. When in bounce mode the flash head zoom goes to its maximum and the display reads "--", so the filename doesn't include [FlashZoomSetting].


580EX_ETTL_FL24.jpg Lens Focal Length 24mm


enter image description here


580EX_ETTL_FL105.jpg Lens Focal Length 105mm


enter image description here


The next two show the corresponding results with the YN685, demonstrating the extreme under-exposure at 105mm.


YN685_ETTL_A24_FL24.jpg


Lens focal length 24mm; Flash Zoom AUTO mode 24mm


enter image description here


YN685_ETTL_A105_FL105.jpg


Lens focal length 105mm; Flash Zoom AUTO mode 105mm


enter image description here


Next an of image with the flash in MANUAL power mode (instead of ETTL) to show there's not a problem with flash output.


YN685_M075_A105_FL105.jpg


Lens focal length 105mm; Flash manual power 3/4, zoom AUTO 105mm


enter image description here


At this point I surmised that maybe what is happening is that the firmware is unaware that the flash is in bounce mode, and when the flash zoom is at 105mm it reduces power because the zoom would be concentrating the light into a smaller area. So I shot in ETTL with the flash zoom in manual mode at the widest possible setting, 20mm. But that didn't produce anything different, so either my theory is incorrect or it's ignoring the manual zoom setting.


YN685_ETTL_M20_FL24.jpg


Lens focal length 24mm; Flash ETTL, zoom manual 20mm


enter image description here


YN685_ETTL_M20_FL105.jpg


Lens focal length 105mm; Flash ETTL, zoom manual 20mm


enter image description here


Summary


                       Lens
Flash Flash Flash Focal Exposure

Mode Power Zoom Length Result
----- ----- ----- ------ -----------------
ETTL Auto A 24 24 OK
ETTL Auto A 105 105 2-3 stops under
Man 3/4 A 105 105 OK (note 1)
ETTL Auto M 20 24 OK
ETTL Auto M 20 105 2-3 stops under

(Note 1: just to show a correct exposure is possible in bounce mode at 105mm -- i.e. the flash has plenty of power).


Answer


This is a known bug with Yongnuo flashes (notably the YN-685's predecessors, the YN-568EX and YN-568EX II). TTL tends to be inaccurate and will underexpose unless you switch the metering mode from Evaluative to Average (see: this DPReview discussion, where one person claims Yongnuo support themselves suggested switching to Average metering).


This is, after all, a $100 reverse-engineer flash of cheap Chinese manufacture. While it may have some feature parity with Canon's flashes, it will always lag behind on copy and component consistency, backwards/future compatibility, warranty service, and resale value. They're great for hobbyist usage, less so for professional usage. While their QA has gotten noticeably better since the days of the notorious Strobist review of the YN-560, the low-low price has gotta come from somewhere. And if it's a new model and you're an early adopter, you may still be an inadvertent beta tester. Yongnuo has many quirks, and the fact that aficionados can tell you where to find manufacture date codes and which dates align with which silent updates is only one sign of this.


You may want to look into Godox's Wistro (bare bulb) and Ving (speedlight) flashes, Phottix's Mitros+ speedlights, or (if you want to go manual-only speedlight) LumoPro's LP180R for pro hardiness and reliability—not to mention better trigger interoperability (Yongnuo's got three separate triggering systems—none of which work together) if you still want to go third party vs. OEM. The Flash Havoc blog is a good source for what's out there.


Most folks purchase a YN-685 simply to have a cheap YN-622C off-camera slave. I love my Yonguo gear for off-camera, but for on-camera bouncing, I'll grab my 580EXII first, every time.


low light - Reducing noise in very high ISO photos


On the weekend I attended a wedding and took my camera along. I was not the official photographer -- just a guest.


My camera is a Canon 5D Mark III, and I was using an EF 50mm f/1.4 USM lens. At the evening reception, which was a dark room with disco lights etc, I was going round taking lots of photographs of all the party people and in order that I didn't have to worry about my camera settings, I shot in Aperture Priority mode, with auto-ISO, and f/number of mostly around f/2 - f/4. I used AI Servo mode so that it would track people dancing etc. Of course, I also shot in RAW. It is a testament to the 5D Mark III that it was able to find focus in such challenging conditions!!


However in my stupidity, I didn't change the maximum auto-ISO setting, and most of the shots were taken at a whopping ISO 25,600 -- the camera seeming to prefer to increase the ISO rather than slow the shutter speed to get an exposure. The shutter speed in most shots is probably faster than it really needed to be - around 1/125-1/250th... For a 50mm lens I probably only really needed 1/80th-1/125th to freeze the action?


This has resulted in some incredibly noisy and grainy shots, lacking in the detail I'm used to. Note that I don't think it's a focus issue - the focus is fine, and the shots aren't blurry either. Just noisy.


I imported all the photos into Lightroom 4, and have been playing with the Noise Reduction and Sharpening sliders, but in order to really get the noise levels to a normal or acceptable level, I've had to push that NR slider all the way up to 80 (choke!!). Normally I'd only apply at most about 40, even in a low-light photo! This much NR has meant that the detail in peoples faces is overly softened, and skin tones are looking almost plasticky.


So my question is, what would you say is the best way to "recover" these photos and balance noise reduction against sharpening, or to reduce the noise in another way? I do also have Photoshop Elements 11 at my disposal, though I'm not the best with it. However, if there is another way in which I could use that to achieve the same thing, I'd also appreciate some pointers.


Answer


When I have extremely noisy images, I do two things:


  • Use a 3rd party noise reduction plugin - in my case I use Topaz DeNoise - it, and others, have free trials - so you could give them a try if you want to experiment.


  • These denoise plugins have sliders that will reduce noise, which softens the image, but you also have control over detail (you can decrease noise but retain detail on edges) and you can also control separately whether noise reduction is applied to highlights, midtones and shadows. So I might first limit the noise reduction to the shadow areas.


  • I do this in several layers, one for dark background with no detail, where I push the noise reduction all the way - not worried about detail. Another layer or three for other areas which have detail I want to preserve.


    • Using layers I can then mask in different parts of different layers.


In your case, I would apply as much noise reduction as I could in LR4, not to the point that you lose detail. Then export to Elements, try out a plugin like DeNoise or Noise Ninja, and work in layers.


How does flexible ISO make shooting digital different from film?


I was thinking at the differences between SLR and DLSR (in Manual mode). In both cases you can change aperture and shutter speed as it suits you. But with SLR you are stuck with the ISO of the film which you happen to have in the camera at the moment, while with DSLR you can vary ISO as you wish, too.


Now maybe the question is naive, but how is this handled in practice?


I imagine that it requires more planning: you want to shoot today under this particular light and you choose a specific film roll rather than another. What if you find a nice shot but there is a shadow which changes the light: you can recover the exposure by changing the other parameters but this is not side-effects free obviously.


What are the effects of this "freedom" afforded by DSLRs? Is it making me (a complete beginner) lazy because I am not forced to think about it? Is it freeing me of a burden by removing an unnecessary constraint?


Answer


With film, you generally don't think of sensitivity as a free variable. Often your favorite emulsion is only available in one or two ISOs. So you have to reach proper exposure by adjusting aperture, shutter speed and/or lighting. Also, negative film is generally considered forgiving on some under- and overexposure.


In digital, you have more freedom to choose other variables, but you should still remember the simple truth that having more light on sensor will give you less noise in photo, so that is what you should consider first before pumping up ISO. But this does not mean that you should never use higher ISO values - noise would still be a far easier problem than excess blur or underexposure.


Actually, with film, you can change ISO by swapping film - take a note which frame you had the film on, rewind and when re-using take as many frames (plus one or two to be sure) with lens cap on. Some advanced bodies (such as Pentax MZ-S) also offer winding film to chosen frame. In medium format, many cameras employ interchangeable film backs. Large format film is handled as sheets, not roll film, so you can always change it between frames.


lens - What is the difference between perspective distortion and barrel or pincushion distortion?


I've heard of:


  • perspective distortion

  • barrel distortion


  • pincushion distortion

  • mustache distortion


What are these different types of distortion, and how do they relate? What causes them, and can they be corrected in the field, or in software post-production?


What about "fisheye projection" — is that a kind of distortion, too?


I've also heard the terms "lens distortion" and "geometric distortion" — are those yet more kinds of distortions, or broader categories, or what?


Answer


Perspective is determined by the position of the camera relative to the scene. When a camera position produces a perspective that makes an object or scene look different than we might expect it to look we call that perspective distortion.


All of the other distortions listed are a result of the way lenses bend light as the light passes through them. They are the result of the geometry with which a lens projects a virtual image of the scene from which the light rays passing through the lens originate.


Perspective Distortion


Perspective distortion is kind of a misnomer. There is really only perspective. It is determined by a viewing position of a scene. In the context of photography perspective is a result of the position of the camera in relation to the scene as well as the positions of the various elements in the scene with respect to one another. What we call perspective distortion is a perspective that gives us a view of a scene or object within that scene that is different from what we would normally expect the scene or object to look like.


If one takes a photo of a three dimensional cube from a position very close to one corner the nearest corner of the cube appears to be stretched towards the camera. If one takes a photo of the same cube from a much greater distance and a much longer focal length so that the cube is the same size in the frame, the same corner of the cube appears to be flattened.


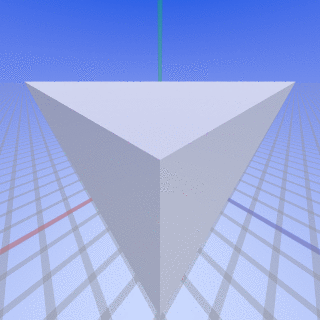
Image copyright 2007 SharkD, licensed CC-BY-SA 3.0


Many people misunderstand that it is the focal length of the lenses that cause the difference. It is not. It is the shooting position used to frame the cube with the two different lenses. If we had a camera and wide angle lens, both with sufficient resolution, and shot the cube with the wide angle lens from the same position as we had filled the frame with the cube using the longer focal length lens and then cropped the resulting photo so the cube is the same size the perspective would also be the same - the cube would appear just as flattened as when we shot it using the longer lens.


If one takes a photo of a rectangular skyscraper from the sidewalk across a narrow street the top of the building will look much narrower than the bottom. (Unless we were to properly use a tilt/shift perspective control lens or a view camera capable of perspective control movements.) When we view the scene with our own eyes our brain compensates for this difference and we perceive that the top of the building is the same width as the bottom. But when we view the photo we took from the same spot we don't give our brain the same full battery of clues (mainly our stereo vision due to having two eyes) and our brain does not perceive the photo in the same way as it perceived the actual scene from the same position.


The same is true when we take a portrait of a face from such a close distance that the nose looks twice as large as the ears. The nose is so much closer to the camera than the ears are that they appear much larger in proportion to the ears than they really are. When we view another person's face from such a distance with our eyes our brain processes the scene and corrects for the differences in distance between the various parts of the face in front of us. But when we view a photo taken from the same distance our brain lacks all of the clues it needs and can't build the same corrected 3D model in our perception of the photo.


Consider what we refer to as telephoto compression:


Let's assume you are 10 feet away from your friend Joe and take his picture in portrait orientation with a 50mm lens. Say there is a building 100 feet behind Joe. The building is 10X the distance from the camera as Joe is, so if Joe is 6 feet tall and the building is 60 feet tall they will appear to be the same height in your photo, because both would occupy about 33Âş of the 40Âş angle of view of a 50mm lens along the longer dimension.


Now back up 30 feet and use a 200mm lens. Your total distance from Joe is now 40 feet which is 4X further than the 10 feet you used with the 50mm lens. Since you are using a focal length that is 4X the original 50mm (50mm X 4 = 200mm), he will appear the same height in the second photo as he did in the first. The building, on the other hand, is now 130 feet from the camera. That is only 1.3X as far as it was in the first shot (100ft X 1.3 = 130ft), but you have increased the focal length by 4X. Now the 60 foot tall building will appear to be roughly 3X the height of Joe in the picture (100ft / 130ft = 0.77; 0.77 X 4 = 3.08). At least it would if all 60 feet of it could fit in the picture, but it can't fit at that distance with a 200mm lens.


Another way to look at it is that in the first photo with the 50mm lens, the building was 10X further away than Joe was (100ft / 10ft = 10). In the second photo with the 200mm lens, the building was only 3.25X further away than Joe was (130ft / 40ft = 3.25), even though the distance between Joe and the building was the same. What changed was the ratio of the distance from the camera to Joe and the distance of the camera to the building. That is what defines perspective: The ratio of the distances between the camera and various elements of a scene.


In the end, the only thing that determines perspective is camera position and the relative positions of the various elements of the scene.


For a look at how even a fairly slight difference in perspective affects an image, please see: Why is the background bigger and blurrier in one of these images?


Lens Distortions


Lens distortions are caused by the way a lens projects a virtual image of the light that enters the front of the lens out the back of the lens. The following terms are various types of lens distortions. Lens distortions are sometimes called geometric distortions because they affect the way geometrical shapes are depicted by a lens.


Barrel Distortion is a geometric distortion where straight lines appear to be curved away from the center of the image. This is caused by magnification being greater at the center of the lens than at the edges. Most lenses with barrel distortion are wider angle lenses that squeeze a very wide scene onto a narrower sensor or piece of film. The ultimate in barrel distortion is a fisheye lens, which sacrifices rectilinear projection in favor of a wider field of view gained by spherical projection. A set of straight horizontal and vertical lines subject to barrel distortion:


barrel distortion


Pincushion Distortion is a geometric distortion where straight lines appear to be curved towards the center of the image. This is caused by magnification being greater at the edge of the lens than at the center. Pincushion distortion tends to show up on the longer focal length end of zoom lenses. A set of straight horizontal and vertical lines subject to pincushion distortion:


Pincushion distortion


Mustache Distortion is, strictly speaking, a geometric distortion that demonstrates barrel distortion close to the center of the optical axis and gradually transitions to pincushion distortion near the edges. Sometimes other patterns of distortion caused by partially correcting barrel or pincushion distortion are also labeled as mustache distortion. A set of straight horizontal and vertical lines subject to mustache distortion:


Mustache distortion


Zoom lenses tend to demonstrate more geometric distortion than their single focal length counterparts. A prime lens, which is a lens with only a single focal length, can be tuned to best correct geometric distortion at that one focal length. A zoom lens must compromise to try and control distortion at all focal lengths. If the pincushion distortion is highly corrected for the longer end, the barrel distortion would be more severe at the wide end. If the barrel distortion is highly corrected on the wide end, it would exacerbate the pincushion distortion on the long end. The wider the ratio is between the widest angle and longest ends of a zoom lens' focal lengths, the tougher the tightrope is to properly correct geometric distortions at both ends.


Even with prime lenses it costs more to precisely correct lenses for geometric distortion than it does to correct them "just close enough". It costs more in term of research and development in the design stage of the lens. It costs more in terms of the number of optical elements used, the amount of materials needed to make those elements, and the cost of more exotic materials used to make some of the most effective corrective elements. It costs more to manufacture those increased number of optical elements, sometimes into more exotic irregular shapes, and at higher tolerances.


Some of the most expensive lenses are also some of the most highly corrected lenses for optical distortions. Lenses such as the Zeiss line of Otus lenses, for example. The cheapest zoom lenses tend to be lenses that display the most geometric distortion as well as other optical aberrations.


Correcting Lens Distortions


What causes them, and can they be corrected in the field, or in software post-production?


The cause of geometric lens distortions is the design of the lens and the way it bends the light that passes through it. Many simple lenses demonstrate geometric distortion of one kind or another. How much a lens corrects for that distortion depends on additional corrective elements added to a lens' optical formula.


The best way to correct geometric lens distortion in the field is to use the lens available at the time that demonstrates the least amount of undesirable distortion.


One can correct geometric distortion using in-camera processing of the image (if the camera has that capability) or in post-processing, but it comes with several caveats.


  • As the edges are curved to correct for geometric distortion the coverage of the field of view is reduced if the rectangular or square shape of the overall image is preserved. Not everything seen on the edges in the uncorrected image will appear in the corrected image.

  • When pixels are remapped resolution may be lost. If the lens is fairly soft and blurry to begin with, this will probably not even be measurable, much less noticeable. But with higher resolution lenses used on higher resolution cameras this can have both a measurable effect and even a noticeable effect at larger display sizes. As Roger Cicala, LensGuruGod1 at lensrentals.com, says in a blog post devoted to the topic,


"You CAN Correct It In Post, but . . .
. . . . there is no free lunch.


  • Any in-camera correction applied to the image when shooting RAW will be reflected in the preview jpeg generated and appended to the raw file, but whether the correction will be applied in post-processing depends upon which raw convertor one uses. In general, third party raw converters such as Lightroom will ignore the instructions regarding correction included in the "maker notes" section of the EXIF information while most camera makers' in house software will apply the in-camera settings when opening a raw file. Also, the correction one can apply using a third party raw converter such as Lightroom will be done using lens profiles provided by that third party application rather than the lens profile, normally provided by the camera manufacturers, used in-camera to generate the jpeg preview or in post using the camera makers' own software. On the other hand, most manufacturers only provide correction profiles for their own lenses (for either in-camera or post-production correction) while third party raw converters will sometimes have profiles available for third party lenses.


Sunday 26 March 2017

What is the difference between levels, curves and contrast settings in post processing?


I have found and read a lot of tutorials that speak individually about curves, levels and contrast in post-processing but no luck so far about finding something that compares them.


It is my understanding that curves is the most flexible tool, while levels is more simplified and the contrast slider is even more simplified. Is this the case?


To put it another way. Am I correct to assume that I can do with curves anything that is possible with levels (and more)? Do I need to bother with the contrast slider at all if I am accustomed to working with curves?


Answer


Yes, your assumption is correct. A levels control is basically the equivalent of a curves control that can only be adjusted at the end points and one point in the middle, while a contrast slider is (usually) the equivalent of moving both ends at the same time (although some may be more sophisticated). The curves tool gives the most flexibility, but also allows you to create very unnatural-looking results.


Why are larger sensors better at low light?


The top answer of What point and shoots are good in low light conditions? says that (1) a fast lens/wide aperture (2) reasonable ISO 400+ handling and (3) a large sensor when put together are critical in shooting in low light.


The first I understand (it lets in more light), the second I understand (the "film" is more sensitive to light). Sorry I do not understand the third factor.


Answer


Its easiest to understand the difference when both the larger and smaller sensor have the same megapixels. If we have a couple hypothetical cameras, one with a smaller APS-C sensor and one with a Full Frame sensor, and assume both have 8 megapixels, the difference boils down to pixel density.


An APS-C sensor is about 24x15mm, while a Full Frame (FF) sensor is 36x24mm. In terms of area, the APS-C sensor is about 360mm^2, and the FF is 864mm^2. Now, calculating the actual area of a sensor that is functional pixels can be rather complex from a real-world standpoint, so we will assume ideal sensors for the time being, wherein the total surface area of the sensor is dedicated to functional pixels, assume that those pixels are used as efficiently as possible, and assume all other factors affecting light (such as focal length, aperture, etc.) are equivalent. Given that, and given that our hypothetical cameras are both 8mp, then its clear that the size of each pixel for the APS-C sensor is smaller than the size of each pixel for the FF sensor. In exact terms:


APS-C:
360mm^2 / 8,000,000px = 0.000045mm^2/px
-> 0.000045 mm^2 * (1000 µm / mm)^2 = 45µm^2 (square microns)

-> sqrt(45µm^2) = 6.7µm


FF:
864mm^2 / 8,000,000px = 0.000108mm^2/px
-> 0.000108 mm^2 * (1000 µm / mm)^2 = 108µm^2 (microns)
-> sqrt(108µm^2) = 10.4µm


In simpler, normalized terms of "pixel size", or the width or height of each pixel (commonly quoted on photo gear web sites), we have:


APS-C Pixel Size = 6.7µm pixel
FF Pixel Size = 10.4µm pixel


In terms of pixel size, a FF 8mp camera has 1.55x larger pixels than an APS-C 8mp camera. A one-dimensional difference in pixel size does not tell the whole story, however. Pixels have two-dimensional area over which they gather light, so taking the difference between the area of each FF pixel vs. each APS-C pixel tells the whole story:


108µm^2 / 45µm^2 = 2.4


An (idealized) FF camera has 2.4x, or about 1 stop worth, the light gathering power of an (idealized) APS-C camera! That is why a larger sensor is more beneficial when shooting in low light...they simply have greater light gathering power over any given timeframe.


In alternative terms, a larger pixel is capable of capturing more photon hits than a smaller pixel in any given timeframe (my meaning of 'sensitivity').


Now, the example and computations above all assume "idealized" sensors, or sensors that are perfectly efficient. Real-world sensors are not idealized, nor are they as easy to compare in an apples-to-apples fashion. Real-world sensors don't utilize every single pixel etched into their surface at maximum efficiency, more expensive sensors tend to have more advanced "technology" built into them, such as microlenses that help gather even more light, smaller non-functional gaps between each pixel, backlit wiring fabrication that moves column/row activate and read wiring below the photo-sensitive elements (while normal designs leave that wiring above (and interfering with) the photo-sensitive elements), etc. Additionally, full-frame sensors often have higher megapixel counts than smaller sensors, complicating matters even more.


A real-world example of two actual sensors might be to compare the Canon 7D APS-C sensor with the Canon 5D Mark II FF sensor. The 7D sensor is 18mp, while the 5D sensor is 21.1mp. Most sensors are rated in rough megapixels, and usually have a bit more than their marketed number, as many border pixels are used for calibration purposes, obstructed by sensor filter mechanics, etc. So we'll assume that 18mp and 21.1mp are real-world pixel counts. The difference in light-gathering power of these two current and modern sensors is:


7D APS-C: 360mm^2 / 18,000,000px * 1,000,000 = 20µm^2/px
5DMII FF: 864mm^2 / 21,100,000px * 1,000,000 = 40.947 ~= 41µm^2/px


41µm^2 / 20µm^2 = 2.05 ~= 2


The Canon 5D MkII Full-Frame camera has about 2x the light gathering power of the 7D APS-C camera. That would translate into about one stops worth of additional native sensitivity. (In reality, the 5DII and 7D both have a maximum native ISO of 6400, however the 7D is quite a bit noisier than the 5DII at both 3200 and 6400, and only really seems to normalize at about ISO 800. See: http://the-digital-picture.com/Reviews/Canon-EOS-7D-Digital-SLR-Camera-Review.aspx) In contrast, an 18mp FF sensor would have about 1.17x the light gathering power of the 21.1mp FF sensor of the 5D MkII, since fewer pixels are spread out over the same (and larger than APS-C) area.


white balance - How to take photos of children in difficult lighting?


I recently went to a one-year-old's birthday party. The event took place inside; there was some light coming through the windows from outside and there was also light from the lightbulbs in the room, although not nearly enough. I used S mode on my Nikon D5100 (with an 18-55 stock lens) in order to reduce blur as much as possible, even though I wasn't able to go too low with the speed given the lighting; I also increased ISO to about 640.


Some of the pictures came out orangey due to the lightbulbs (the white balance was set to incandescent), especially when people were sitting just below the light source, while others came out blurry, despite my effort.


What should I have done better? Would shooting in RAW have helped?


Answer


In a situation like this there is no substitute for a faster lens. Kids are a challenge to photograph at the best of times but with low light you only have two options flash which kids tend to hate or a faster larger aperture lens. Something like an f/1.8 or f/1.4 prime lens aren't too expensive and let in a lot more light than your kit lens which is f/3.5 at best. This allows you to lower the ISO and get faster shutter speeds which is essential for kids because they never keep still.


If you shoot in RAW this will give you the most options for post processing the images when you get them into your computer. With RAW white balance settings do not effect the RAW data at all so you can set the balance later individually on each image.


Saturday 25 March 2017

Why does a ball-head get stiff in cold weather?


While to shooting in rather cold-weather (-14C), the ball-head on my tripod became very stiff and very hard to move. Even with the knobs at their minimum which normally cause the whole thing to drop completely, I had to apply force. Yes, I was partially frozen but two cameras (both freezeproof) I had with me kept working without any issues. The third one (not freezeproof) would no longer focus.


The question is what causes the ball-head to become so stiff?


More importantly, can anything be done about it?


Also, are there models which do not have that problem?


Answer


While Steven's answer is a good guess, it turns out lubricants freeze long before metal contracts due to cold. This makes ball-heads with oil or grease not usable beyond a few degrees below 0C / 32F.


Grease-free and oilless ball-heads operate easily down to -40C / -40F. At some colder temperature, materials will eventually contract but that will be far below the lowest operating temperature of any digital camera.


camera recommendation - Why is Canon 60D considered 'better' than Canon 700D?


So Canon 60D is considered a semi-pro machine, but it's like 3 years old, while the 700D is a year old and can pack the same punch it seems from the specs.


Does the 60D have anything that the 700D doesn't?


Is it really better?


terminology - Who, or what, is an "Uncle Bob"?


I've heard people complaining about "Uncle Bob" taking pictures at events. From context, it sounds like Uncle Bob is an annoying guy with a camera?


What is an "Uncle Bob"? What is the background of the term "Uncle Bob"? Is he based on an actual individual, or is it more a stereotype?


Answer


Uncle Bob is not actually your Uncle Bob.


Uncle Bob is the derogatory term used by professional and semi professional photographers to describe a 'man with a camera' and occasionly someone with 'all the gear, no idea'. There isn't a clear definition of Uncle Bob, and he can be found in many guises, this is my experience so feel free to mix and match:


  • Not necessarily bad people.

  • It's Uncle Bob's attitude rather than photographic ability. Prepare for arrogance if they think they have one better picture than you.


  • When found at events, they can usually be found taking a large amount of photos of their loved ones. On rarer occasions they somehow wangle themselves a photo pass and believe they're in the big leagues.

  • They can be seen shooting in P for Professional mode

  • Will happily tell you how his gear is better, and how much it cost to try make you think you're inferior.

  • No regards to professional etiquette. Will happily get in other photographers' way.

  • Can masquerade as a professional.

  • Remember photographer waistcoats back from the days of shooting film at sports event? Well they're not quite dead yet...

  • Especially at weddings they've been known to stand intrusively close to the hired professional to try get the exact same shots.


cleaning - Is it risky or difficult to wet clean an image sensor?


I've discovered spots on the image sensor of my DSLR camera that cannot be cleaned using a blower bulb, so I would like to know the risk of problems, such as further image deterioration or damage to the sensor or low-pass filter, associated with wet cleaning the image sensor. Just how high (or low) is the risk? Is this a difficult task to perform?


The products I expect to use are as follows:


In my research, I have also found the following products, for which there is a greater degree of trust because the manufacturer guarantees against sensor damage when used properly:


Additionally, the reviews are generally positive, so is it worth it?


My biggest concern at this point is further staining or residue from the cleaning process. How likely is this going to affect image quality, and would it be worse compared to the dust or other contaminants?


Answer


I do it regularly, I don't regard it as difficult. It's not that risky in the grand scheme of things but it's riskier than it used to be, especially with larger full frame sensors. Before the useless "self cleaning" function was implemented, the low pass filter assembly sat right on the sensor. Now there is an air gap to facilitate vibrating the LPF in order to dislodge dust. This airgap removes support for the glass LPF in the middle allowing it to bend and potentially break under pressure. See this photographers's cautionary tale:


http://forums.dpreview.com/forums/read.asp?forum=1032&message=30812646


So if you have a new camera with "self cleaning sensor" be very careful, esp. if it's full frame.


Friday 24 March 2017

How to remove Nikon strap rings with plastic covers?


I want to remove the strap rings on my Nikon D7000. They look to be pretty standard triangular split rings, but they also have a little plastic cover on them. How do I safely remove the cover in such a way that I can put the ring and the cover back on later if so desired? After some examination, it looks like I could just pry it off, but it would be nice to know if anybody's has experience with this before, so I don't screw it up.


enter image description here


enter image description here


enter image description here


Answer


I have done this on my D800, I assume they are exactly the same.


So first remove the plastic clips, just push them HARD towards the on-camera mounting post, they should just pop off.


Then remove the triangular rings, they are VERY stuff so you may need a flat-head screwdriver to pry the end open, just rotate them around like a key-ring and off they come.


I NEVER use a strap, and these are very annoying jiggling about all the time...


Why does my aperture setting change as I zoom on my DSLR kit lens?


I am new to the photography field, there are few things which I am not able to understand. I am playing around with my Nikon D90 along with its kit lens (18-105mm).


While reading about Depth of preview, the author asks to do some basic exercise to better understand DOF, like this:


  • set your aperture to smallest number f/2.8, f/3.5, f/4 with 70mm or longer lens.


When I tried to set aperture to f/3.5, and tried to change focal length, my camera is setting aperture automatically in every possible mode (which I know of). It is changing aperture in the following fashion:


1. 18-24 ----> 3.4 to 4
2. 18-35 ----> 4.5
3. 18-50 ----> 5
4. 18-105 ---> 5.6

But if i set my aperture to 5.6 or higher, it does not change when I change the focal length of my camera. I know I am not doing some basic thing right, but I'm still not sure why this is happening. Can some one help me to understand this?


Answer


It is happening because you have a variable aperture zoom lens. The solution is to get a quality lens, otherwise you have to live with the limitations which are actually marked on the barrel of your lens.


It says 18-105mm 1 : 3.5 - 5.6G which means your maximum aperture is F/3.5 at the widest focal-length (18mm) and F/5.6 at the longest (105mm). It changes in increments between that. So, if you are set to F/5.6 then you can zoom with whole focal-length without aperture changing. If you set your aperture to F/3.5 then after a short increase in focal-length, the lens has to diminish its aperture.


Does black and white film have any advantage over black and white effects in digital?


I understand that digital sensors use an RGGB layout for pixels, where 50% of the pixels are green, 25% blue, and 25% red. This means that any particular pixel is sensitive to only one particular frequency, and overall, there is a bias towards green light.


However, with black and white film, all the crystals are sensitive to light. I don't know if they are biased towards any frequency in the visible spectrum.


My question is, aside from ISO, sensor/negative size, how does black and white film stack up against digital images that have a black-and-white effect applied to them? In terms of black and white, do color digital images lose information in the conversion that film would retain?


Answer


Black and white films can have a different spectral sensitivity based on the emulsion - going so far as to be only sensitive to blue/green light (orthochromatic film) or full spectrum (panchromatic). With the panchromatic films, some are sensitive up into the infrared spectrum, allowing partial or fully infrared shots (pending your filter choice).


Films have differing grain structures, which can be somewhat manipulated through the use of pushing, pulling, and differing developers and development techniques.


There are film effect actions that one could use, but it would be accurate to say that there is no effect that can truly impersonate a film.


Black and white also has one hell of a large dynamic range - allowing you a good bit of flexibility when it comes time to print.


The biggest differences, imo, are in the dynamic range that film can get in a single shot and in the look and feel of the grain structure. It'd take multiple shots with digital and a good bit of post to come close, and even then, it would only be close.


lens - How do you reconcile generally positive user comments with negative comments in a review?


My question was prompted by this DPReview review of the Nikon DX 18~200mm, wherein on page 3 the author reveals some significant sharpness and distortion issues, leading to final assessments of


Pronounced distortion across much of the range


and


Extremely soft at 135mm


These seem like major problems to my beginner eyes... yet one can find many, many satisfied owners around the internet, see B&H's store page to give one example.


These two realities - that of the carefully tested review and the cumulative experience of the masses - seem quite difficult to reconcile in this particular case.


If we assume the reviewer is competent and the lens tested is representative of the model's performance at large...


  • are the reviewer's standards out of touch with all but the most serious photographers?

  • or is this subtle, widespread (perhaps even subliminal) buyer's remorse performance bias based on the relatively high cost (for DX) of this lens?

  • something else entirely?


Answer


  • The reviewer may have used a sample of one. Lenses will vary.


  • The reviewer is measuring scientifically in the lab, pixel peeping using test charts and compiling MTF curves. Owners of the lens are taking vacations shots and pictures of the family dog.


  • the reveiwer has experience with a number of other lenses, including pro lenses. Owners of the 18-200mm? It may be the only lens they own.


  • the reviewer is measuring 1% distortion that most users will not see in real life images. Most wouldn't know what pincushion distortion is, or notice it unless you pointed it out. I have the lens and distortion is only noticeable to me in shots of brick walls or skyscrapers, and photoshop corrects it anyway!


  • the reviewer is using test charts meant to expose any weaknesses in the lens. An owner of the lens is just taking pictures in real life situations and probably can't tell which images were taken with the 18-200mm and which were with the 50mm prime. I can't, not in terms of sharpness or distortion.


  • the reviewer is judging the quality of the lens vs cost to arrive at a overall value relative to other lenses. He will no doubt think it's pricey and may judge that you could obtain a better value (either sharper or less expensive). But an owner of the lens has already paid (or overpaid) and paid the credit card bill and they're not concerned about how it compares on a test chart against another lens. They're taking pictures, and able to zoom to 200mm or out to 18mm and catch shots they wouldn't get if they had to switch lenses, or left the other lenses at home.


  • I would also wager than 90% of amateur photographers don't know about or care about vignetting or chromatic aberration either. Even the trendy bokeh is probably not in most people's vocabulary :)


I bought the lens expecting it to be reasonably sharp, but mainly versatile and convenient, for a walk about lens. It's amazing that a super zooms exist IMO, much less that they are reasonably sharp. If I had experience using professional lenses, I might feel this lens was a bit soft or slow. But hey, it's basically a kit lens. Most of the people buying these are not pros and not interested in test charts.


What he says about distortion is probably true of all samples. Not sure about the softness at 135mm, I've not noticed it, and other reviewers like Thom Hogan didn't mention it. To be honest, I use the lens mainly between 18-50mm, and occasionally zoom out to 200mm to get some detail. I would rarely use 135mm.


I have done basic testing of my 18-200 at 50mm f/8 and compared to my prime 50mm at f/8. I didn't use a proper test pattern, but some newspaper. To my eye they were almost the same. The prime had a bit more contrast, and slightly sharper. If it had been a normal picture of a landscape I don't know if I could tell them apart to be honest.


As much as I love the my 85mm prime and a few others, if I could only own one lens I guess I'd stick with the 18-200mm for versatility. For that versatility it's worth the price IMO. So I'd give it a good review, but if I worked for dpreview and had all the gear to measure it against a database of other lenses, I might be more lukewarm in my assessment.


chromatic aberration - How to minimize/avoid purple fringing before/during shooting?


I know it is possible to avoid purple fringing using post-processing software's chromatic aberration correction capabilities but I have a few pictures where the one I'm using (Rawtherapee on Linux) cannot fully remove it.


Most of the pictures where I experienced a lot of PF are taken against the light from sunset reflecting into water. Generally it is not visible on the JPEG preview of the camera so I suppose it may be caused by rawtherapee not being as efficient as camera and/or Adobe Lightroom post-processing. However for a few pictures it is so strong that even the camera JPEG preview experience a lot of PF.


For example this picture where all lights should be white is the JPEG extracted from the raw file produced by camera with a Nikkor 50mm 1.8 and I have the exact same result using a Nikkor DX 35mm 1.8: Purple Fringing on BC parliament


So my question is how to avoid those PF, or at least how to minimize them before post-processing (i.e. before or when shooting). When shooting against sunlight can a polarizing filter help? I also read that some UV filters seems to be able to reduce them. What about them? And also what could I do for something like the above picture taken at night?


Answer


The purple tinge to the lights in your photograph has been caused by longitudinal chromatic aberration, which results when using a wide aperture, meaning the blue and red components of the spectrum are not focused as sharply as the rest. It can also manifest as a green tinge, or even both where there are specular highlights either side of the plane of focus.


To reduce longitudinal CA, use a narrower aperture, or if that's not an option, try to focus manually, using live view if your camera supports it. The fact that all of the lights on the left hand building are showing the same amount of purple fringing suggests that this might be fixable with more accurate focusing (though this might result in green tinges to the lights on the building to the right).


More generally, lateral chromatic aberration, which can result in purple fringing at the edges of the frame, is as Mitch says in his answer, an attribute of the lens and cannot be fixed in-camera (notwithstanding lens profile corrections which apply CA reduction via camera software).


Thursday 23 March 2017

pricing - What should I charge for photography as an amateur?


I just started up my own photography business and I was wondering what I should with how pricing works. I thought of doing pets, families, babies, and senior pictures. I have some experience with a camera when I took my aunt's camera which was a Canon 70D and took pictures of my cousin's wedding.


I'll be getting the Canon Rebel T6 with 18-55mm and 75-300mm. I am based in Champaign, Illinois which is a little over 2 hours south of Chicago, just under 2 hours west of Indianapolis, and 2 hours and 45 minutes east of St. Louis.


These are the pictures I took of my cousin's wedding if it'll help with the pricing.


Answer


This was supposed to be a comment, but it got wild, anyone is free to edit, delete and write.


As I read the comments you have your aunt's Canon 70D, nothing more, and you want to be a professional photographer. This gonna be long, unless you are Faust and you have a Mefisto's contract on the desk.


If you can borrow the 70D for a longer time, do so and shoot anything interesting. Look for the today's pro results in the field(s) of your interest and try to find out how they did it. Experiment with the camera modes, push it to the limits. (Shallow focus, deep focus, long time, short time...).


Choose your brand. There is no equation how to determine The Perfect Brand ™. Every brand has top products line, reasonable quality line and low-cost line; and the quality is close enough among the top brands. Set the budget and try cameras from different brands. Try how they fit to your hands, how are the controls friendly to you, etc. Do not stick to recommendation that states "[Brand] is the best you can get..." I wanted a Nikon for years. I tried several bodies (my friends had bought). Then I tried a Canon. I have bought a Canon 700D because it fits to my hands and my way of handling. You may be Nikon guy, who knows?


The choice of lenses goes with the aim of your work. Probably, you will learn this during your practice. You can start with the set 15-55 and 75-300 lenses; they are not crap but they are not the best either. For you, they are cheap and I suppose you are not about to actually need the pro lenses yet. Buy camera set that suits you the most and UV filters to every lens you have*, then look for flash units, filters, better lenses,...


Regrading the prices. It is too fast right now I think. I would take "the job" when I am confident I will do it without regret. Especially for weddings and other it-happens-only-once jobs, two cameras are minimum gear to have - when one breaks, you have spare one.


Once you are confident and want to shoot for a living the pricing is quite easy. You must be in profit in total. Set your hourly wage - count shooting and postprocessing (For start you can align it with minimum wage). Add the software license (count the license hour cost and multiply it by the postprocessing time). Your gear wont pay itself, so set the date you want to get your investment back. Add the appropriate part of the cost to the final price. And finally, add the additional costs, like the fuel, car insurance, food, etc.


Now, make these calculations for your cousin's wedding like they were regular customers. Start the business when you would pay that money for your wedding album. You can start with shooting for several good friends of yours for free; but be super cautious not to screw it up and use this to advertise yourself. Add the best learning photos (probably from the last year only) to your webpage and add new ones regularly - you have to show that you are worth the money you demand, right?


Stay focused. And good luck.


Will a tilt-shift lens solve my 'leaning building' shots?


I shoot primarily with a Nikon D300, and that's not likely to change soon. The camera does everything I need it to do, but this. I also use a 17–55 mm lens, which I know that Thom castigates as being too expensive for not enough lens, but it's worked well for me for years.


I'm on a trip in Italy at the moment, though, and having some serious problems with looking up at large buildings going to infinity. Consider il Duomo di Milano (Milan Cathedral):


Il Duomo


It doesn't actually tilt inward like that, it's a pretty solidly built structure. For some reason, I'm really noticing on this trip that my building shots are just mangled.


Is this readily solved in post production such that the resulting image is printable and usable for something other than internet slideshows? Or should I be looking at a tilt-shift lens for this? And if I do look at the lens, I've been told that the flash overhang on the D300 means that the Nikon 24mm lens won't fit — is that true?


Answer


A tilt-shift lens is indeed the best way to correct this effect in-camera, but even then, it can look odd if the distortion is quite high. The example you have given should be OK. If you want to do it in post-processing, Lightroom 3 now has built-in perspective correction tools. When you use them, a grid overlays the photo which is updated live, so you can spot when the verticals become parallel. With a high-enough resolution image, this should produce results almost as good as with a T/S lens, for a lot less money.


Wednesday 22 March 2017

Other than the iMac, what's a brilliant display for my images?


When I started researching gear to start my photography passion I fell in love with the large iMac display. The large bright screen at the best buy was showing a sideshow if images that looked better than life and I was in awe.


Since I am a Microsoft developer, buying Apple would be very limiting. Are their other options for me to rival the Apple display but with a Windows machine?


What do photographers use as displays?


Mainly I want to see the images really pop off the screen and be really vivid. Spending is relative, so I could splurge and make a nice desktop workstation for myself that can double as a "photo lab" of sorts for my hobby. As for size, the larger the screen the better... I love the huge iMacs!


Answer


I guess there isn't much more I could say other than I own the Apple CinemaDisplay 30" LCD screen, and I am a heavy duty Microsoft/.NET developer. I work entirely in Windows 7 on my custom-build PC (not a Mac), and this screen has been great. I purchased it quite a number of years ago, and it is still running strong.


If I was in the market more recently, I would definitely go for an LED LCD screen, rather than a CCFL LCD screen. LED screens, particularly those with a clear/glossy screen, offer a much wider gamut, more accurate color rendition, and broader coverage of the AdobeRGB and NTSC gamuts than other screens. There are several manufacturers who make LED computer screens these days, including Eizo with their ColorEdge screens, LaCie with their new 730 model (one of the best photo editing screens on the market with the broadest gamut I've ever seen...my next screen if the Apple ever dies), as well as more well-known brands such as NEC (I'm having a hard time finding professional grade LED monitors from NEC right now), Apple, etc.


If you want a high quality, wide gamut screen that is designed for a photo editing workflow, I highly recommend looking into LED screens, particularly professional grade ones. NEC and Apple will have them at more reasonable prices, but with narrower gamuts than true professional grade LED screens. If you want the top of the line, with the widest gamut currently available, look no further than the LaCie 730. It covers 123% of the AdobeRGB color gamut, which is ideal for photographic editing. It is not quite as physically appealing as the Apple CinemaDisplay, but color-rendition-wise, it is fantastic.


post processing - What is the stippling effect used in newsprint and comics called, and how can I create it?


reference


I am looking to achieve this dot pattern (stippling) effect in some way, be it analog or post processing. If you can identify this technique and some tips on how to go about it? It has a print look to it and reminds me of old comic book pages.


Answer


Photographs that are to be printed in books, magazines, newspapers are converted to a "half-tone". The most common way this was done:


A finished photograph on paper was supplied to the printer. This photograph was copied using a giant camera, common to all shops that prepared photographs for publication.


The camera contained a screen, not unlike window screen. These hovered just over the film in the camera. A copy was made on photographic film. The resulting image revealed a pattern of dots. Each dot is a different size, proportional to the blackness of the original photograph, in that location.


The resulting negative, called a "half-tone" was exposed onto a metal plate coated with light sensitive emulsion called a resist. Development etched the metal. The etching pattern replicated the dot pattern.


Ink was applied to this plat. It was used much like a rubber stamp to make ink copies of the original. Just look at any picture in a newspaper or your school book. Use a magnifying glass, you will see this dot pattern. Digital photo editing software can apply a dot pattern image to your digital images.


Tuesday 21 March 2017

Tips for making black and white conversions in post-processing?


In image editors, especially powerful ones like GIMP and Photoshop, there happen to be a bevvy of ways to turn a color image into a black and white one, but not all techniques are the same.


How do you analyze an image for black and white conversion to determine which black and white conversion methods would work best?


What are some different methods for converting black and white images?


Some good questions related to black & white here on Photo.SE:


equipment recommendation - What's a good Nikon lens (DX) for a serious hobbyist landscape photographer?


I shoot a bit of everything, though mostly landscape stuff. Mostly with a beanbag, or handheld.


I currently have the following lenses:


The 18-70 is fine, but the 70-300 is cheap and slow, and I often find myself wanting to wider than 70mm with it (changing lenses is a hassle, and lets dust in).


For both of them, I often think VR would help, particularly in dim lighting (e.g. shaded forests, night shots, etc)


I've got two camera bodies, a D300s and a D70.


I've been considering the Nikon 18-200mm f/3.5-5.6 G IF DX VR, which goes for ~£545..£580


However, another option might be to get a 18-105mm f/3.5-5.6 G ED VR (~£220) plus a 55-200mm f4-5.6 G AF-S DX VR IF-ED (~£240), allowing one on each camera body - are there any advantages to that, compared to just the 18-200mm?


Are there any other lens options that make sense?


I don't really have a fixed budget, but anything over £600 is probably pushing it.

(The less money I can spend without getting rubbish, the better.)


Monday 20 March 2017

Is the kit lens focal length specified for APS-C or FF?


I have the 18-55mm kit lens for my Canon 50D and was wondering if they're still specified against full frame 1:1 crop? Would my 18mm actually be 1.6x?


I ask because I doubt anyone with a full frame camera would even think of using a kit lens of this calibre.


Answer


18-55mm is the focal length, which is independent of sensor size.


Your lens is made for APS-C, so the any field of view measurements are likely for APS-C. It would be the equivalent field of view of a 28.8mm-88mm, which we refer to as 28.8e-88e.


On a full-frame camera, it will vignette.


developing - What's the best way to develop old, exposed film?


A friend of mine just found 3 rolls of exposed 135 (i.e. 35mm) film. They are at least 10 years old. He'd like to know if it is even worth taking them to the local hour photo lab but also if he should give them any special instructions.


Answer


I don't know from experience, but I think it would be possible for the film base to deteriorate after such an extended time, and thus cause it to become more fragile. I would consider developing it by hand rather than having it run through a machine which might put undue pressure on the roll. Also - In my opinion, "trying" it is always worth it ;) You never know what you could get!


Why can't I change my Nikon D3200 aperture in Live View?


I removed the lens to show to the shutter release. While putting the lens back on I didn't place it correctly on the first attempt. Also, when I removed the lens, the camera was on and possibly in live view.


Now, the aperture doesn't change while in Live View mode. (Yes, I'm holding down the -/+ button. Also while it is on manual.) I can only change the aperture while in viewfinder mode.


Did I mess something up? Or is it in the settings somewhere?


What do I need to know to get started with food photography?


I'd like to get started in food photography, and my first attempts are worlds apart from the examples we see all around us on food labels, in cookbooks, and in advertising. What are some tips to someone getting started?


I know that background blurring and good color management is a good start, but I'm not sure about other things, e.g. lighting and styling.


Answer


Well there are two types of food photography: product shots (for menus), and food documentation for blogs, recipes etc.


Product shots are a whole different ball game. Often these "models" are constructed using materials that simulate the look and texture of the food--designed to stand up to rigors of product shots. For example, using lard to for shots Ice Cream--since Ice Cream melts quickly, it's hard to take multiple shots under hot lights. So the next time you're at a Burger King and you wonder why your Whopper looks nothing like what you see on the menu, it's because they used something like beets instead of tomatoes.


The other type, is more of a documentation style, in which you try to present dishes served in an appealing way. To me, this is more fun (since I'm a total foodie), so these tips are geared towards photographers who wish to document meals and dishes, as opposed to making images that look like food.


Here is the first attempt I made at food photography. Shot with a 5D2/Canon 50mm f1.4.
And here is the second attempt. Shot with a 5D2/Canon 50mm 2.0 Macro.


Some tips that have worked for me:


  • Natural light is so much better than flash. If you are shooting your own creations, place them on the table near a window during the day and get up on that lovely light!


  • Shoot the dishes right as they're plated. Since this isn't food science type, you don't have much time. Shoot the food quickly.


  • Shoot from a just-above table perspective. Photographs that look like images we see every day aren't as visually pleasing, so a top-down shot of a bowl of soup looks worlds apart from a shot from just above the table.


  • Gorilla Pod or Handholding. Since the 5D2 has awesome high-iso performance, I can shoot in dim lighting. If your camera doesn't have stellar high-iso, then invest in a gorilla pod, or other similar pocket tripod. Handholding is much easier to frame the shot in, so thats what I stick with.


  • Set the image properly. Move other dishes, glasses, and silverware in and out of the frame as desired. During the 35 courses at elBulli, I was constantly shifting things around to get an image I thought would be compelling.


  • Look for interesting angles. This may be personal preference, but food lends itself well to angles. For each dish you shoot, try a shot from a different angle.


From the techincal side of things:


  • I try to shoot with the largest aperture available to give a nice DOF, and to produce a nice bokeh (background blurring).


  • I use 50mm for a nice tight-crop of the dish.


  • Macro lenses will let you get a nice in-close focus of your subject.


Specific to photographing your own food:


  • Use a cloth to clean up any aberrant sauces, food particles etc. You can clean these up in post-process, but much faster if you don't have to.


  • Garnish is key. The sprinkle of green onions offer a nice contrast to a bowl of New England clam chowdah.


  • Think about your dishes. White dishes are fairly pleasing as they brighten up the dish, and give good contrast to the food contents.


  • Think about your table setting. White table cloths, like white dishes, will brighten up your image.


  • If you're at home, you can use your own tripod, and forgo buying a table top one.


Most importantly: Have fun. Food is a social experience that is so much more than just a combination of nutrients. Keep that in mind, enjoy your food, and have a good time taking pictures of what you're eating.


Saturday 18 March 2017

canon - Why the lights of that photo are too much blue/white in the edges?


yesterday I was taking some pictures from my city during the night and I could not find an explanation regarding the strange edge of blue/white lights.


I have the RAW file of it and I've tried to change the exposure of those lights but it did not fix the look of the lights.


I will appreciate any help.


Take during night


Answer


  1. The reason of those flares to appear is optical diffusion and internal refraction which is almost fine with normally observed objects but is obvious if the object is a bright spot light source - it affects all objects equally but it is only visible on high contrast transitions.

  2. The reason of them being asymmetrical is coma.

  3. The reason of them being coloured is longtitudinal chromatic aberration which results from dispersion.

  4. The reason for them to look so terrible is aggressive profiling which needs to be done to bring the image data recorded by camera closer to the reality (the bad form of colour sensing to be specific), and it's imperfection is exceptionally obvious with saturated objects. This is very apparent in photos of recent Canon DSLRs because they tend to require strong profiling.


Here are two verions from same file, one from Adobe Camera RAW and one from RawTherapee with custom weaker (less saturated) colour profile.


There is a way of making saturated bright sources look good - give tonal curve a wide shoulder and it will look natural. (your tonal curve will be different from the one displayed, experiment to find the one which you need)


Related.


equipment recommendation - Portrait photography of children (Christmas)


I floated an offer to my family to photograph my neices and nephews for Christmas. Now, we're doing this with plenty of time for them to get professional work done if mine don't really come out great, but if they do it's a win for them and for me (since I get any size I want this time). So... Given that I've placed my photographic skills on the line, does anyone have some great tips (or sites) for:


  1. Portrait photography of childen


  2. Christmas portraiture in general


  3. Gear suggestions


I anticipate having some fun, regardless, they're all great kids. For help, the age range is 2 to 7 with 4 girls and 2 boys. I also have studio lighting and a backdrop stand.


Answer


I have been taking images of children recently and found that those closer to 2 have not wanted to pose in anyway shape or form!


My most successful have included setting up a studio area and defining where the children need to be, then letting them play with toys, dance to music and chat away to each other. In doing this I got some nice relaxed poses.


I think its key for you to define what you are looking for, is it a group shot, formal, relaxed, one or 2 children at a time.


On my recent ones I have chosen to shoot with my 35mm-70m 2.8, this has produced some lovely tones. With a small amount of zoom on it, it helps with the fact that the children move around a lot!


My technical set up is normally 2 diffusers, white background, AP of 6.3 to 11 and shutter of 1/125


As for the Christmas aspect -I am sorry but I havent done anything specifically for that - hopefully someone can help you on that.


Good luck!


alt text


Friday 17 March 2017

How to fire an external flash in Liveview mode on a Canon 77D?


I've bought a non-TTL Yongnuo flash (YN-560 IV) for my Canon 77D and it works fine when shooting through the viewfinder. However switching to Liveview mode, I found out that it annoyingly stops working. It is possible to get the flash to fire if I switch to high-speed burst mode, however in that case the flash fails to synchronize with the camera properly. Is there a way to force the camera to sync the manual flash properly?


I've read the answers to this related question, however my camera doesn't have a silent shooting mode, so they don't apply. Likewise the Canon manual says:


A non-Canon flash will not fire during Live View shooting.


However it obviously does if I switch to high-speed mode and the manual doesn't say anything about how to enable proper synchronization.


Answer


It is fairly obvious, both from the statements in the Instruction Manuals of practically every EOS DSLR ever made with Live View capability but without 'Live View Silent shooting' modes and from the actual user experience when one tries to use a manual flash that can't communicate its presence to the camera body, that Canon does not support using a flash which the camera cannot even detect is attached to the hot shoe in Live View mode with the non-LV Silent Shooting models. The reason none of the Manuals for the non-LV Silent Shooting models say anything about how to enable proper synchronization is because these cameras, as designed, are not capable of such synchronization with a third party manual-only flash.


What problem are you trying to solve that requires you to use a non-Canon manual only flash in Live View with your 77D?


Why is the front element of a telephoto lens larger than a wide angle lens?

A wide angle lens has a wide angle of view, therefore it would make sense that the front of the lens would also be wide. A telephoto lens ha...